How to Place Text on Curved Surfaces in Siemens NX
Whether you are adding a serial number to a pipe, branding a consumer product, or engraving text onto a complex mold, placing text on non-flat surfaces is a essential skill for any Siemens NX user.
In this tutorial, we explore two primary methods: Wrap/Unwrap (for zero-distortion) and Project Curve (for quick application).
Watch the Step-by-Step Video
The Challenge with Curved Geometry
Standard sketching in NX occurs on a flat 2D plane. When you try to extrude text from a flat plane onto a cylinder or a sphere, the letters near the edges often look "stretched." To solve this, we need to map the text to the face's actual surface area.
Project Curve (Best for Irregular/Organic Shapes)
If you are working with a complex, organic surface where "unwrapping" isn't feasible, Project Curve is your go-to tool.
- Create a Datum Plane: Position a plane in front of the target surface.
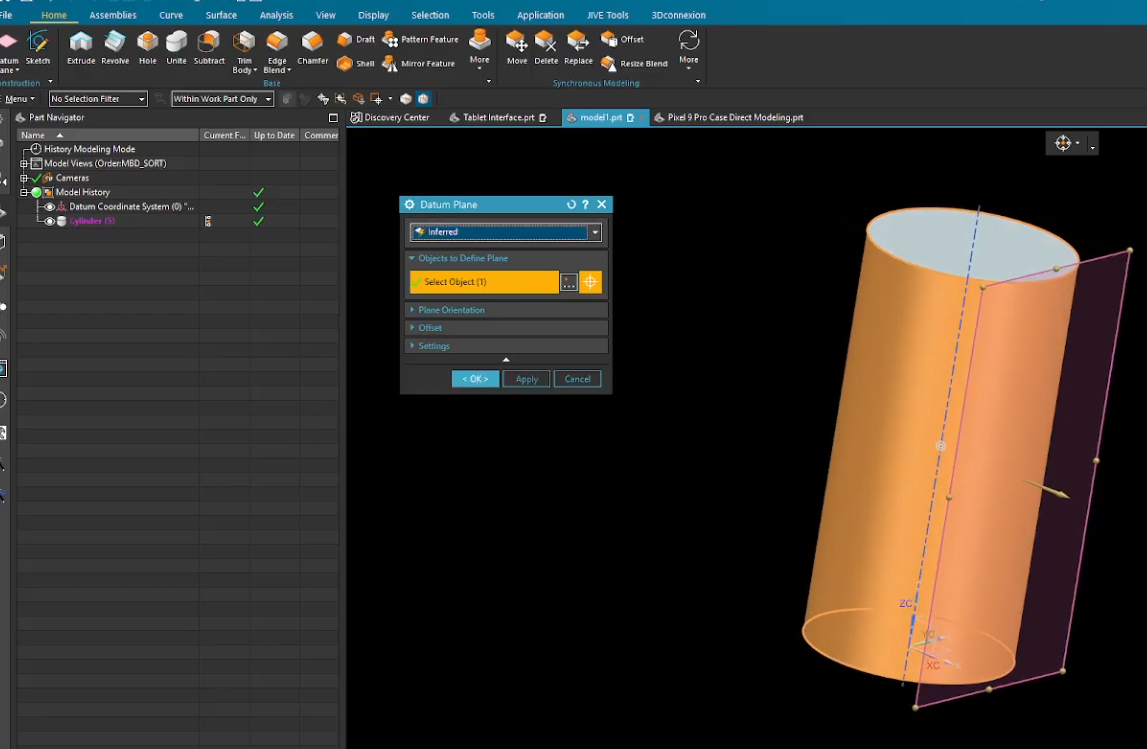
- Sketch Line: Sketch a line on this plane that you will use as positioning for the text.
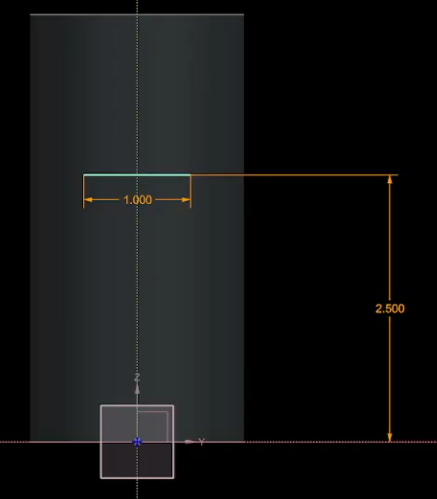
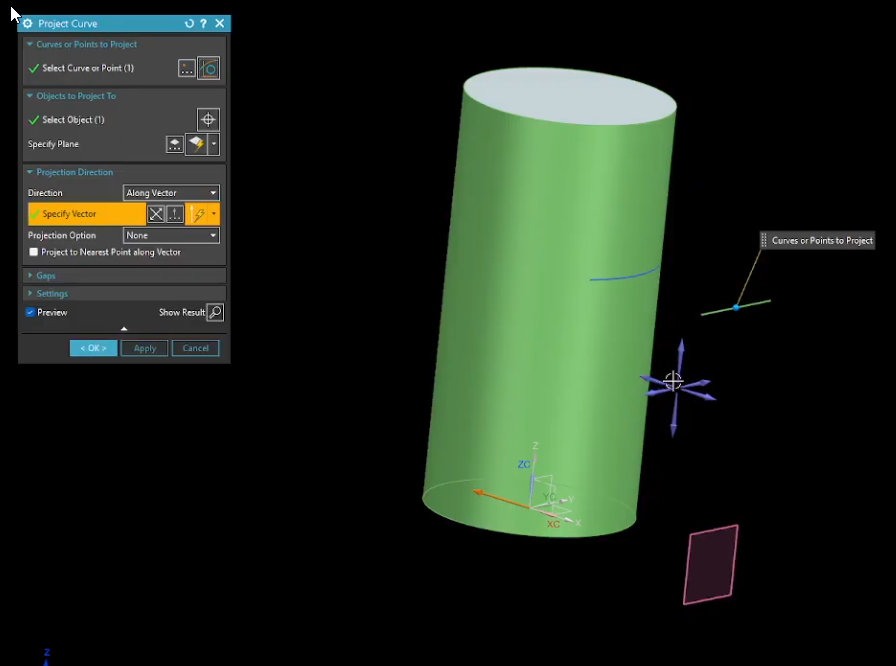
- Project: Project the curve on the face that will receive the text.
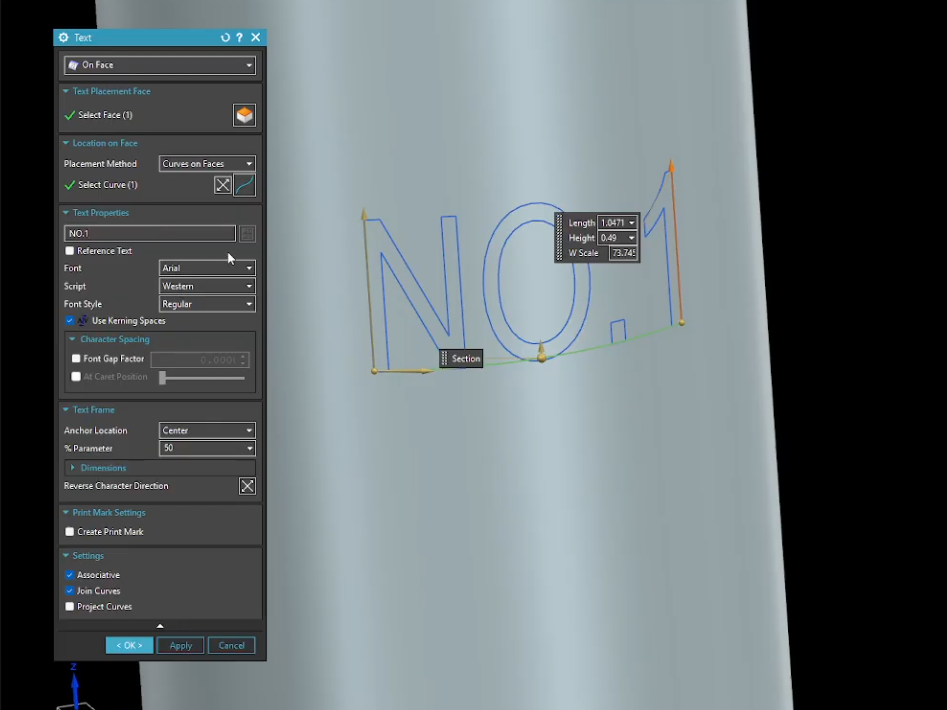
- Place the Text: Set your parameters to the Text window seen below. Remember, you have freedom to change the aspect rations and kerning here.
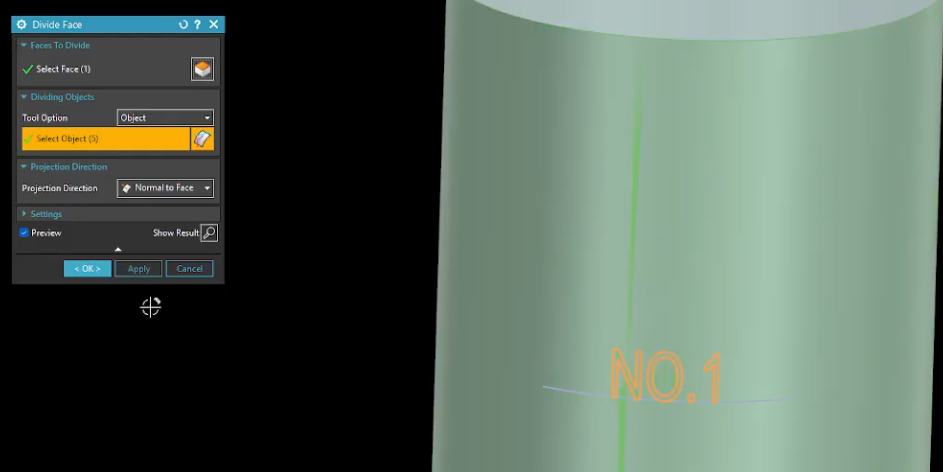
- Divide the Face: Use the Divide Face command to imprint this text on the face.
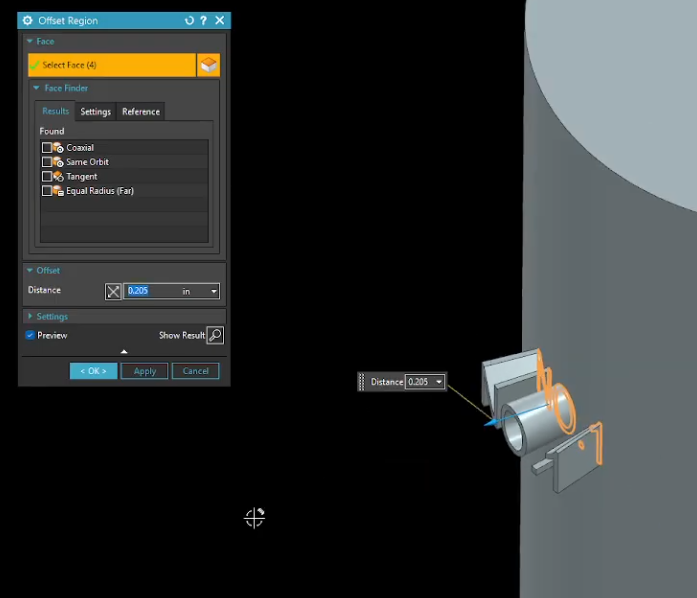
- Use the Synchronous Modeling Offset command to either add or remove material normal to the faces.
Pro Tips for Professional Results
Font Selection: For CNC machining or 3D printing, use simple, "Single Stroke" fonts to reduce toolpath complexity.
Associativity: Always keep your "Project" or "Wrap" features associative. This way, if you change the text string in the sketch, the 3D engraving updates automatically.
Conclusion
Adding text to a design is often the final "polish" that makes a digital model look like a real-world product. By mastering the Wrap and Project tools, you can handle any surface geometry NX throws at you.
Next Steps: Master the Foundations of Feature Modeling
Placing text on a surface is just the first half of the equation. To transform that text into a physical embossed or engraved feature, ensure your foundational modeling geometry is perfectly stable:
Build Perfect Text Guide Paths: Learn how to constrain your text position, alignment, and orientation using our comprehensive guide on mastering Sketches in Siemens NX.
Drive Text via Top-Down Design: Discover how to copy and control text curves or sketch profiles across separate components using our step-by-step tutorial on How to Use the Siemens NX WAVE Geometry Linker.
Standard software tutorials only go so far when facing unique, real-world production bottlenecks. If your design team is struggling with workflow inefficiencies, modeling errors, or assembly instability, we can help.
At JIVE Engineering, we provide on-site Siemens NX Corporate Training customized entirely around your company's actual production files, native geometry, and internal workflows. We help your design team transition from basic button-clicking to mastering robust, failure-proof top-down modeling strategies.
Explore Our Custom NX Training Programs or Contact Our Team today to schedule a workflow audit.