
How to Create a Custom Siemens NX CAM Manufacturing Template
Watch the Video!
Need a video to help you through this process? Then check out the video on youtube by clicking the links down below!
If you find yourself creating the same tools, setting the same tolerances, and picking the same operation types every time you start a new project in Siemens NX, you’re losing valuable time.
The secret to CAM programming is the Custom Manufacturing Template. Instead of starting from a blank slate, you can start with your favorite machine setup, tooling library, and operation parameters already loaded.
This is useful for specifying templates for certain machines!
Here is a step-by-step guide to building your own.
Step 1: Prepare Your Template Part
The foundation of any template is a start part—a .prt file that contains all the settings you want to reuse.
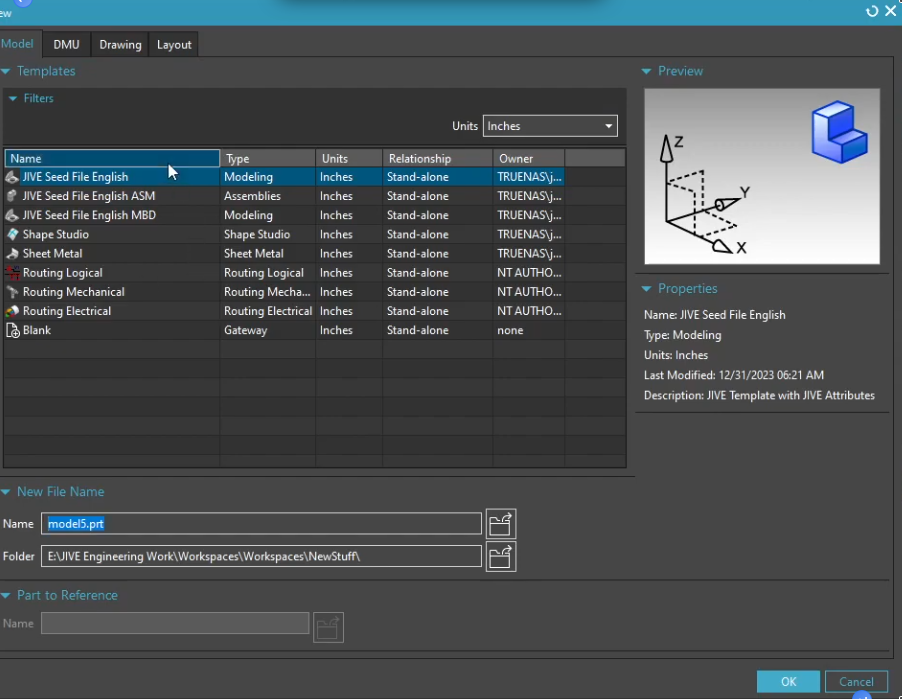
- Create a new part file.
- Switch to the Manufacturing Application.You can do this bit hitting CTRL+ALT+M on your keyboard, or, using the dedicated button found in Applications> Manufacturing.

- Use the following parameters. Remember, you can change these later.
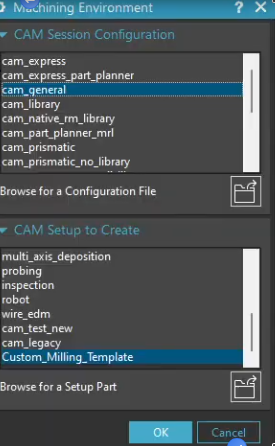
- Configure the Essentials:
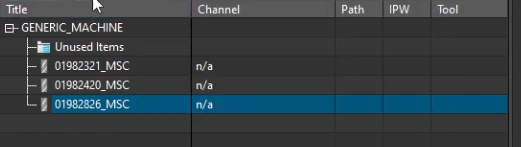
- Tooling: Add your standard end mills, drills, and probes to the Machine Tool View.
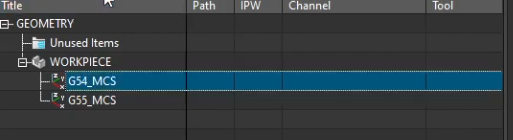
- Geometry: Set up your MCS (Machine Coordinate System) and Workpiece. If you always use a specific clearance plane, set it here.
- Methods & Tolerances: Define your Roughing, Semi-Finish, and Finishing methods with your preferred stock allowances and tolerances.
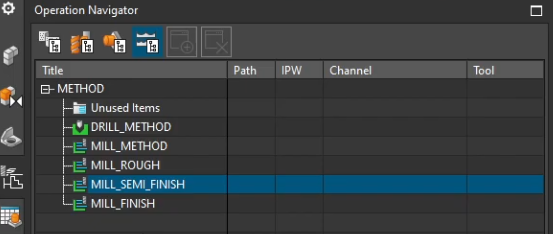
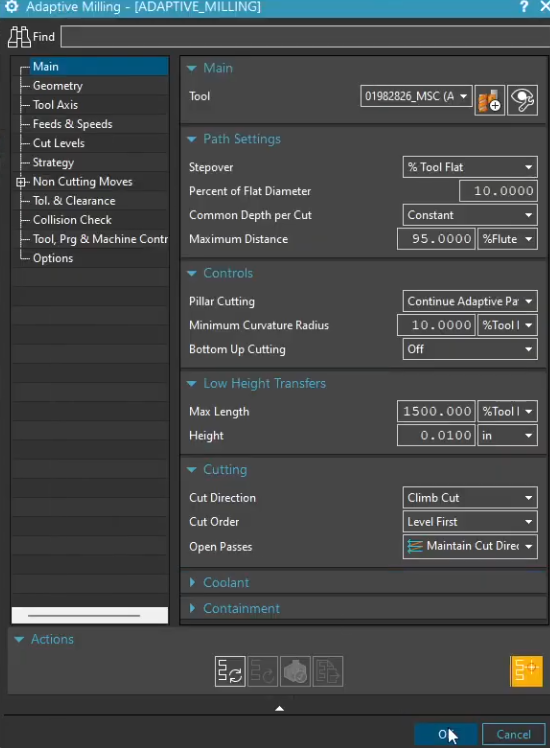
- Operations: Create "ghost" operations. For example, if you always use a Planar Mill or Hole Making routine, create them now. You don't need to select geometry yet; just set the internal parameters (like stepover, feed rates, or non-cutting moves).
- Once your items are in place, navigate to the following location by selecting on the items that are going to be used in the template. Remember, you must do this for each item!
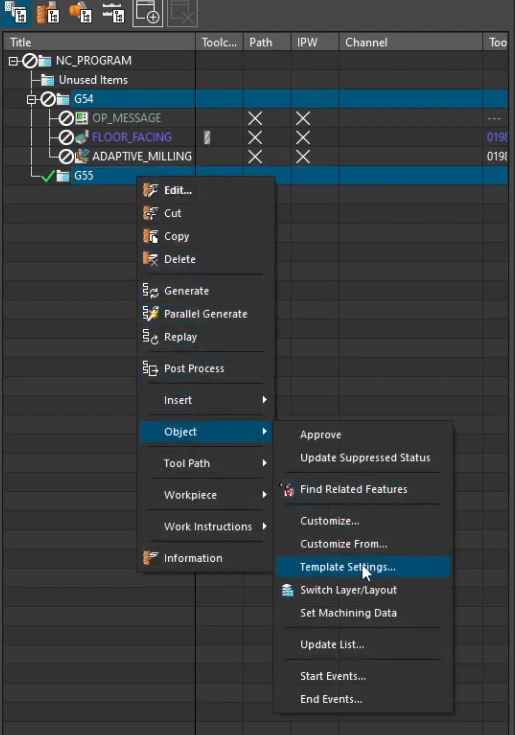
- At this point, the window seen be low shows up. Below is an explanation of these items.

- Object can be used as a template - This item will be available to the template. This one is self explanatory.
- Create if parent is created - If you have this option turned on, then the item will be displayed in the respective Navigator as long as a parent is created. If this option is off, then your object will only be available in its respective Create… operation. For example, if you classify the operation 3D Adaptive Roughing (found in mill contour) as a template object, but not create it if a parent is created, then this command will only be available once you hit Create Operation. It will not be in the navigators at all.
Step 2: Save and Locate Your Template File
Once your part is configured, you need to save it in a location where NX can find it.
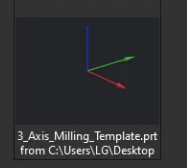
- Save the Part: Give it a clear name, such as
3Axis_Template.prt. Typically, NX manufacturing templates are stored in a predefined path. However, it is not always feasible to save to this location. Therefore, we suggest you save it anywhere that is easily accessible, such as your desktop.
Step 3: Use Your Template
At this point, you are ready to use your template. You can do this for as many machines as you want! Let's walk you through it.
- Open the file that will be machined. In this case, the CAM environment has not been activated.
- Activate the CAM application. Select Browse for a Setup Part.
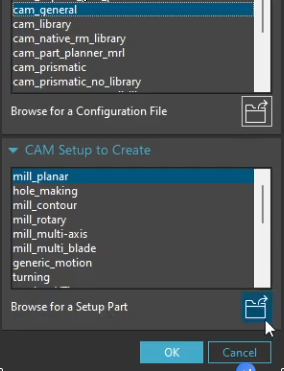
- Select your template.

- Select OK.
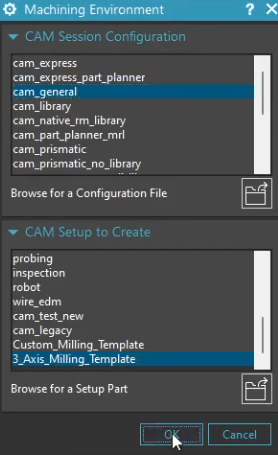
- Your environment adopts all the settings you enforced in your template.
Why This Matters
Creating templates isn't just about speed; it's about reliability. By "baking" your best practices into a template, you eliminate the risk of forgetting a critical setting or using the wrong tolerance.
If you have multiple machines like a Mazak, Mori, or Haas, they might house different tools and have different operations programmed for them. You can make a template for each of those machines.
Next Steps: Populate Your Template with Standard Operations
A manufacturing template is only as powerful as the operations pre-loaded into it. Now that your environment framework is built, learn how to configure and embed standard toolpaths into your master template:
Automate Prismatic Roughing: Master the foundation of 2.5-axis programming with our step-by-step guide on configuring a Planar Milling Operation in NX CAM.
Standardize Deburring Workflows: Eliminate manual edge breaks on the shop floor by embedding a pre-configured Chamfer Mill Operation right into your template geometry tree.
Standard software tutorials only go so far when facing unique, real-world production bottlenecks. If your design team is struggling with workflow inefficiencies, modeling errors, or assembly instability, we can help.
At JIVE Engineering, we provide on-site Siemens NX Corporate Training customized entirely around your company's actual production files, native geometry, and internal workflows. We help your design team transition from basic button-clicking to mastering robust, failure-proof top-down modeling strategies.
Explore Our Custom NX Training Programs or Contact Our Team today to schedule a workflow audit.