
How to Qualify Parts for Siemens NX Electrical Routing: Step-by-Step
In this post, we’re breaking down the foundational first steps of Electrical Routing. Before you can drag and drop wires, you need to prepare your digital environment.
Typically, this is handled by the administrator. You can usually find these in the Reuse Library section of NX.
Here is the step-by-step workflow for turning a static assembly into a routing-ready assembly.
Step 1: Analyze Your Master Assembly
You need to understand the physical constraints of your "Master Assembly" before introducing electrical logic.
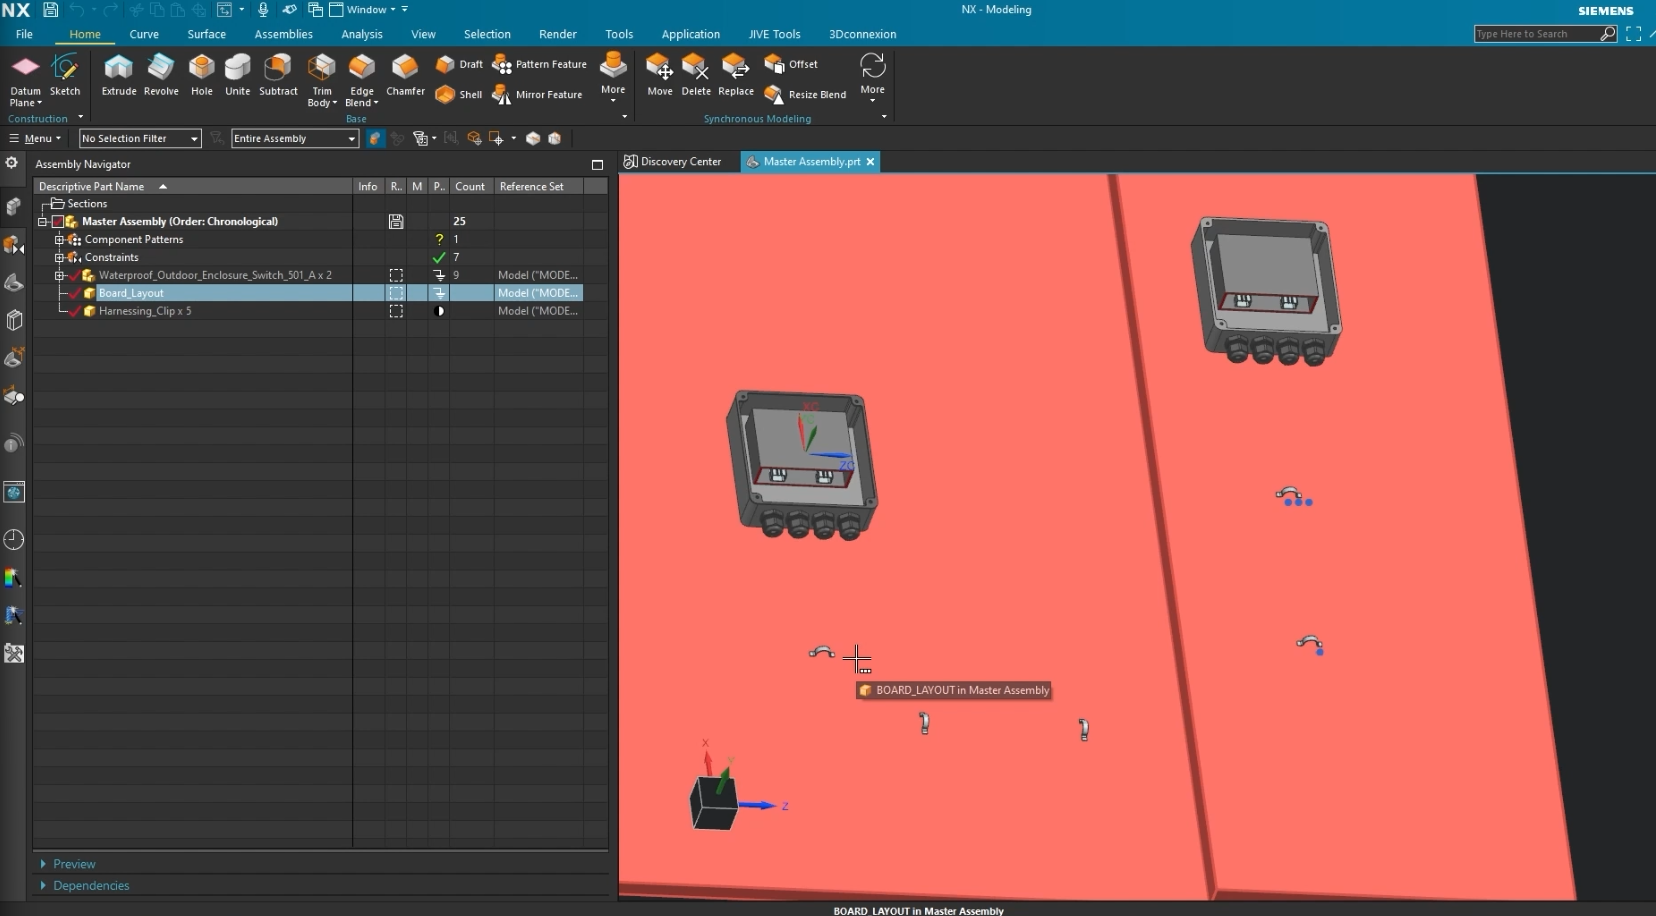
In our example project, we are working with an Outdoor Waterproof Enclosure. Here is the rundown on this assembly:
- The Source: A "Network Switch" board with two Molex headers.
- The Middleman: Waterproof "grip" connectors (cable glands) that lead out or into the box.
- The Path: A series of harnessing clips that guide the wire.
- The Obstacles: A physical "hump" in the enclosure geometry that the wires must route over (not through).
- The Destination: A final junction box component.
Step 2: Routing Rule
You cannot route wires to bodies that have no classification. In other words, the bodies must be told they will be used in routing in order to actually use them in routing.
In standard modeling, a hole is just a hole. In Electrical Routing, that hole needs to be identified as a "Port" so the software knows a wire can enter or exit through that hole. This process is called Qualifying Parts.
Qualifying gives your 3D models "intelligence." It tells NX:
- "This is a connector."
- "This is a clip."
- "This is a device."
Without this step, the routing automation tools will have nothing to latch onto.
This is an example of a qualified device. Notice the blue arrow pointing in a direction
Step 3: The Qualification Checklist
In this specific workflow, we identified three distinct categories of components that require qualification before we can begin.
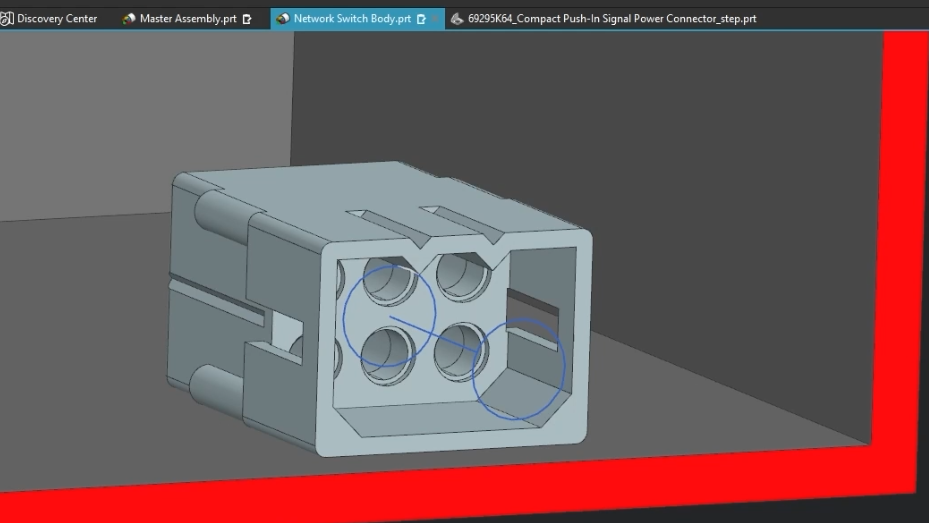
1. The Device
The Network Switch (the box with the red face) is our primary device. It contains the Molex headers. These two connectors will serve as the Device. Think of a device as an item you must plug into. For example, the ports on your computer are devices, as they are entry points for a cable (say, a USB-A or USB-C cable).
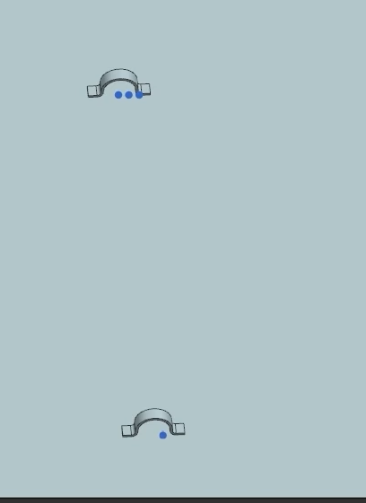
2. The Fixtures (Clips)
We have Harnessing Clips scattered across the board. These will be qualified as Fixtures. Fixtures typically do not care about which way the harness comes in through; they simply serve as constraints for the harness.
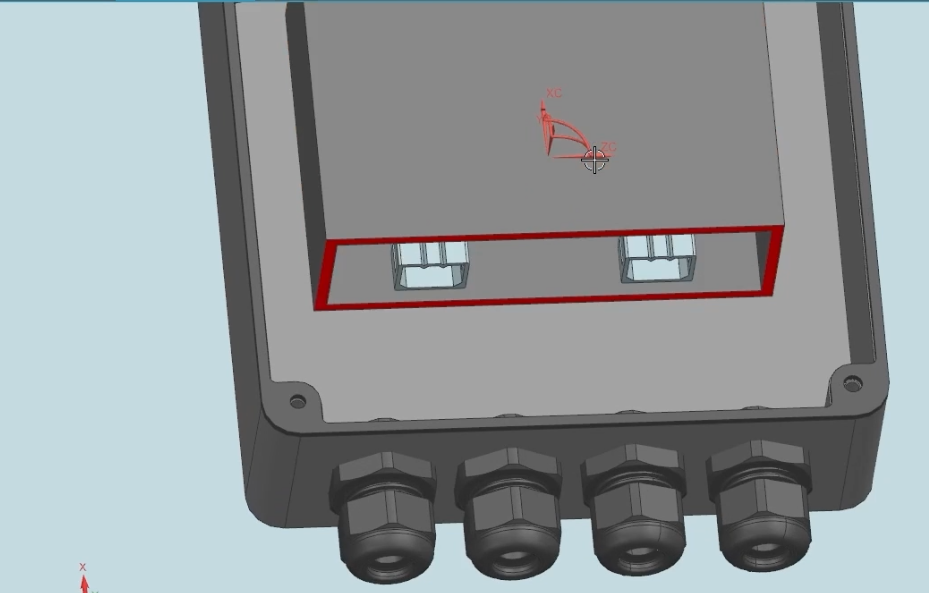
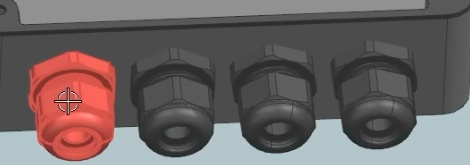
3. The Fittings (Grips)
The Waterproof Grips at the bottom of the enclosure are there to prevent water from coming into the enclosure. We can either classify them as Fixtures or Fittings. To keep the nomenclature clean, we will classify these as Fittings. Fittings usually have a sense or direction to determine from which end the harness must enter from.
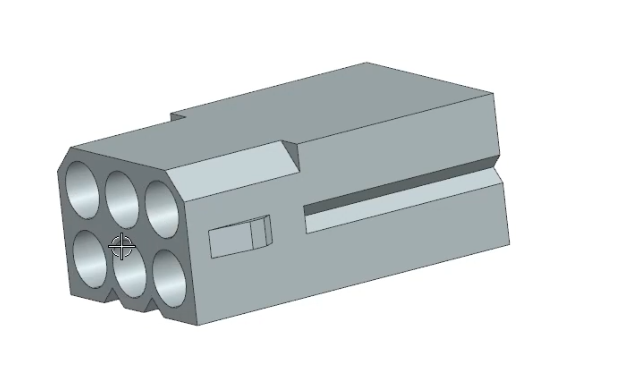
4. The Mating Parts
Don't forget the harness parts! We need something to connect to the network switch device! The "Compact Push-in Signal Power Connector" is not in this assembly, but it is the end that must connect to the device! Therefore, you must open it and qualify it. In this instance, we will also classify this as a Fitting.
Summary
Building a wiring harness in NX is 80% preparation. By taking the time to audit your assembly and qualify your parts correctly, the actual routing of the wires becomes a simple task of connecting the dots.
Do you need help creating a library, or need wire routing training? Reach out to us at [email protected].
In the next lesson, we will dive into the technical "how-to" of applying these qualifications to the specific part files.
Next Steps: Master Complex Assemblies & Downstream Interfaces
Now that your standard 3D models are embedded with intelligent routing nodes, ensure your upper-level assembly architecture remains clean, stable, and highly performant with our advanced modeling guides:
Manage Moving Routing Harnesses: Learn how to use unique positional states to track wire movement across flexing assemblies without cluttering your data using Siemens NX Arrangements vs. Reference Sets.
Rapidly Seat Qualified Components: Once your parts are fully qualified, snap them into your main layouts instantly using our guide on the modern Siemens NX Assemble Command.
Standard software tutorials only go so far when facing unique, real-world production bottlenecks. If your design team is struggling with workflow inefficiencies, modeling errors, or assembly instability, we can help.
At JIVE Engineering, we provide on-site Siemens NX Corporate Training customized entirely around your company's actual production files, native geometry, and internal workflows. We help your design team transition from basic button-clicking to mastering robust, failure-proof top-down modeling strategies.
Explore Our Custom NX Training Programs or Contact Our Team today to schedule a workflow audit.