
How to Use Siemens NX Part Families to Standardize Components and Save Hours
Do you find yourself modeling the same component over and over again just because a single dimension changed? Whether it’s a series of bolts, a range of mounting brackets, or structural tubing, manually creating every variation is a massive time sink.
This is where Siemens NX Part Families come into play. In my latest video, I walk through the standard, spreadsheet-driven method that every NX user should have in their toolkit.
What are Part Families?
In Siemens NX, a Part Family allows you to create a "Master Part" that acts as a template. By driving this template with a spreadsheet, you can automatically generate dozens, or even thousands, of unique part files (.prt) based on different parameters. It is the backbone of CAD automation for any professional library.
The Step-by-Step Workflow
1. Prepare Your Master Part
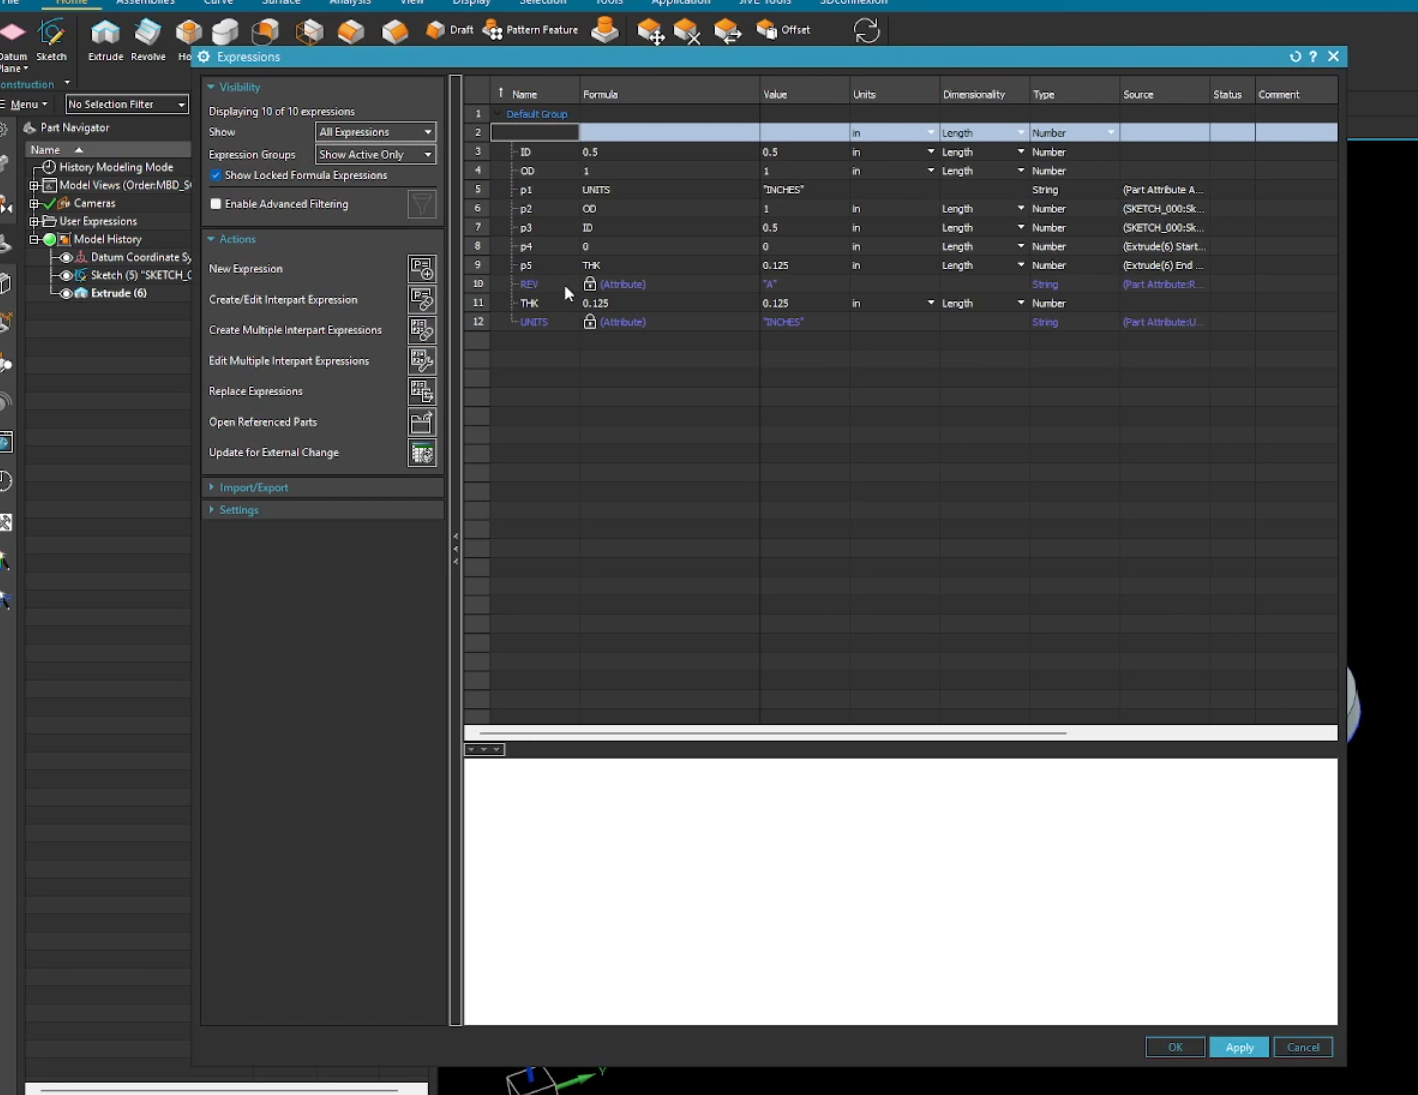
Before opening the Part Family dialog, your model needs to be robust. Use Expressions (Ctrl+E) to name your critical dimensions. Instead of generic names like p1, use descriptive terms like Length or Outer_Diameter. This ensures your spreadsheet is readable and easy to manage.
2. The Part Family Dialog
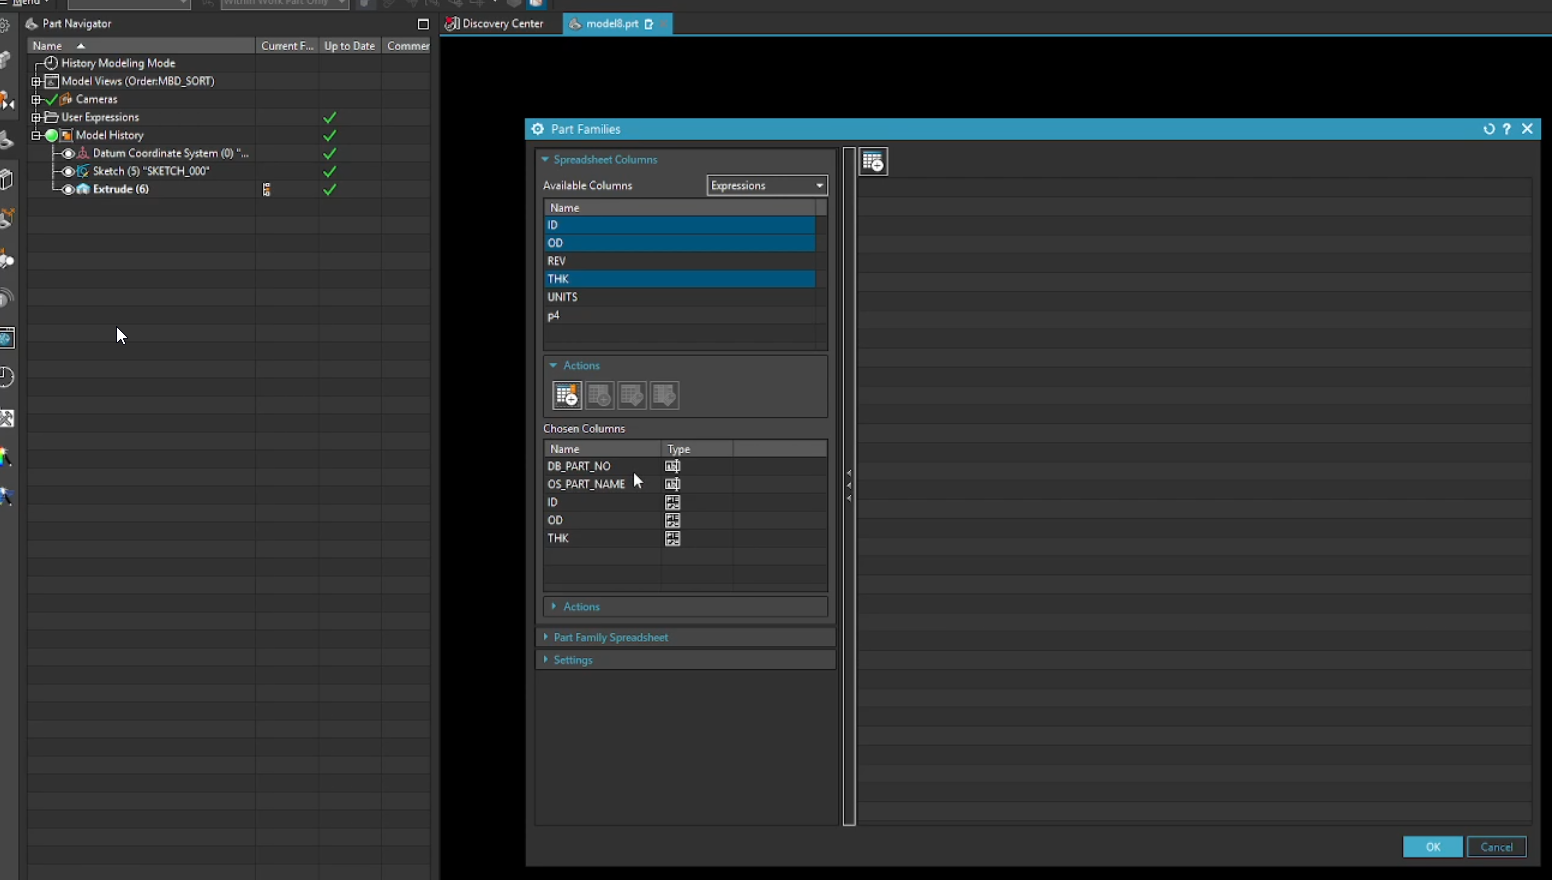
Navigate to Tools > Part Family. In this menu, you select the "Columns" of your table. You can vary more than just dimensions; you can also control:
Feature Suppression: Turning parts of the model on or off.
Attributes: Assigning unique Material specs or Part Numbers to each member.
3. Driving Data with Excel
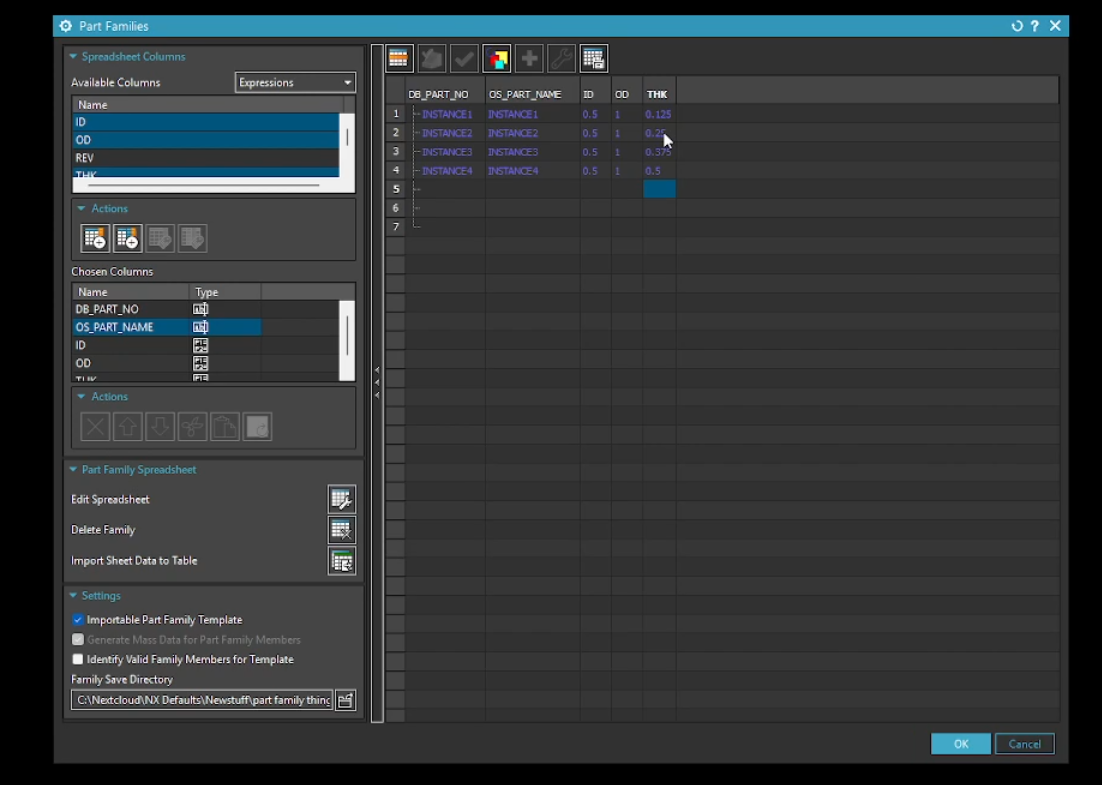
Once you click "Edit Spreadsheet," NX launches Microsoft Excel. Each row represents a new member of the family. You can use Excel's native functions—like formulas or drag-to-fill—to populate your data lightning fast.
4. Generating and Verifying Members
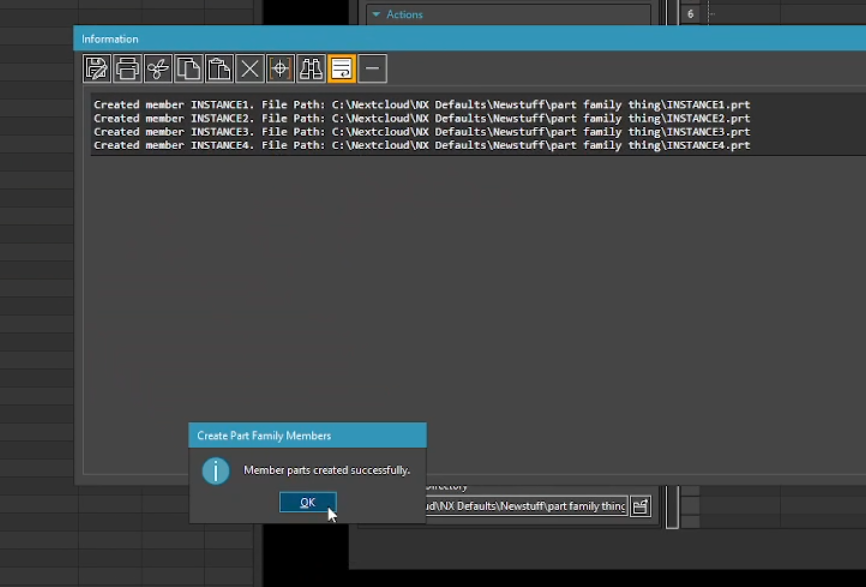
After saving your spreadsheet, use the "Verify" tool in NX to ensure your parts update correctly. Finally, generate the member files to a directory where they can be easily accessed by your entire design team.
Why This Matters for Your Design Team
Eliminate Repetitive Tasks: Model once, then let Excel do the heavy lifting.
Standardization: Ensure everyone in your company uses the exact same geometry.
Seamless Updates: Need to add a new size? Just add one row to your spreadsheet.
Next Steps: Advance Component Automation & Assembly Display
Mastering standard spreadsheet-driven part variations completely changes how your team handles component configuration. Scale up your automated workflows and master large assembly management with these technical NX guides:
Upgrade to Knowledge-Driven Part Frameworks: Take your standard part variations to the next level by deploying automated, rule-based component libraries using our tutorial on How to Create Siemens NX Part Families Using the KRX Method.
Control How Standardized Parts Display in Assemblies: Once your part family members are generated and populated into layouts, master how their geometry and positional states are visualized using Arrangements vs Reference Sets.
Scale These Workflows Across Your Engineering Team
Standard software tutorials only go so far when facing unique, real-world production bottlenecks. If your design team is struggling with workflow inefficiencies, modeling errors, or assembly instability, we can help.
At JIVE Engineering, we provide specialized, bespoke Corporate Engineering & CAD Training customized entirely around your company’s native production files and internal design standards. We move your team past basic button-clicking and equip them to build robust, failure-proof modeling workflows that save hours of engineering time.
Explore Our Custom Training Programs or Contact Our Team today to discuss your team's specific training needs.