
How to Find Mass Properties & Center of Gravity (CG) in Siemens NX
Whether you are designing a simple bracket or a complex aerospace assembly, knowing your part's weight and balance is non-negotiable. In Siemens NX, the Mass Properties tool is your primary source of truth for engineering data.
In today’s post and accompanying video, we’re breaking down the exact workflow to find your Center of Gravity (CG) and ensure your model’s physical data is 100% accurate.
Watch the Full Tutorial
Step 1: The Foundation – Assigning Materials
The most common reason for "Zero Mass" errors in NX is a missing material assignment. NX calculates mass based on the volume of the geometry multiplied by the density (ρ) of the material.
Go to the Tools tab.
Select Assign Material.
Choose your material (e.g., Steel, Aluminum 6061) and select your body.
Click OK.
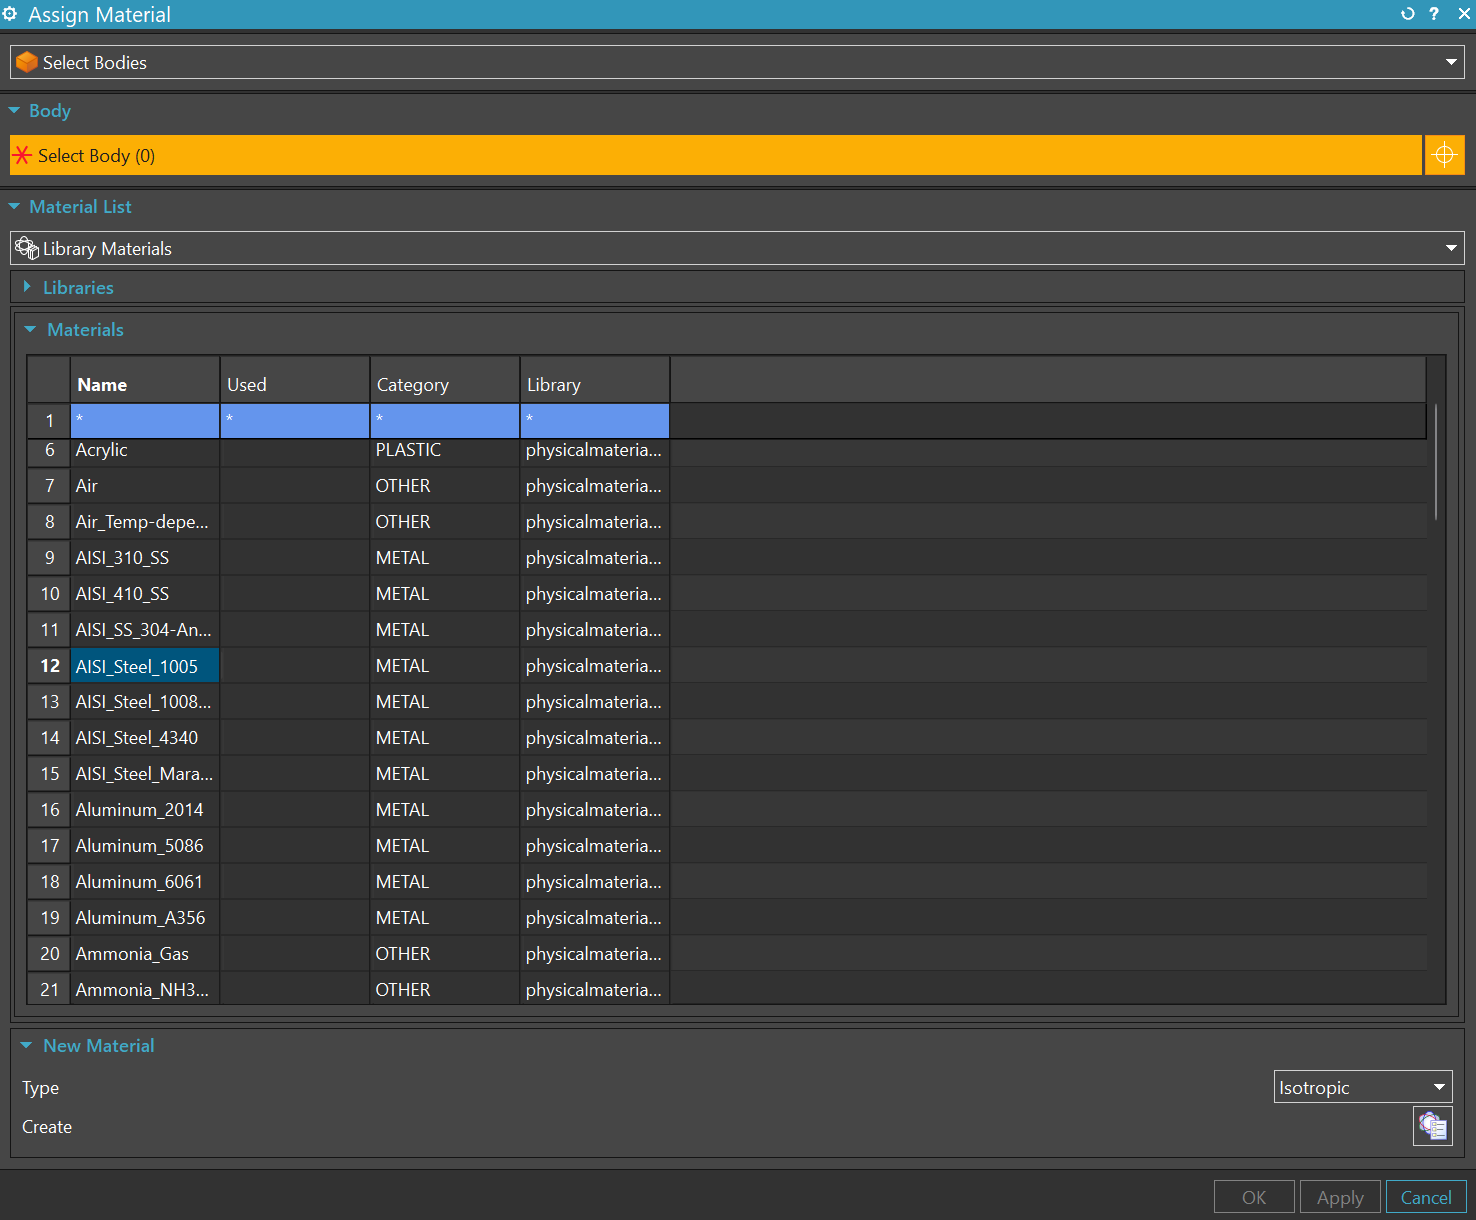
Pro Tip: If you don't assign a material, NX often defaults to a density of steel.
Step 2: Using the Measure Tool
In newer versions of NX, the Measure tool is a Swiss Army knife for data.
Find Measure in the Analysis tab.
Ensure your Selection Filter is set to Solid Body.
Click on your part.
In the Results window, expand the Mass Propeties tab.
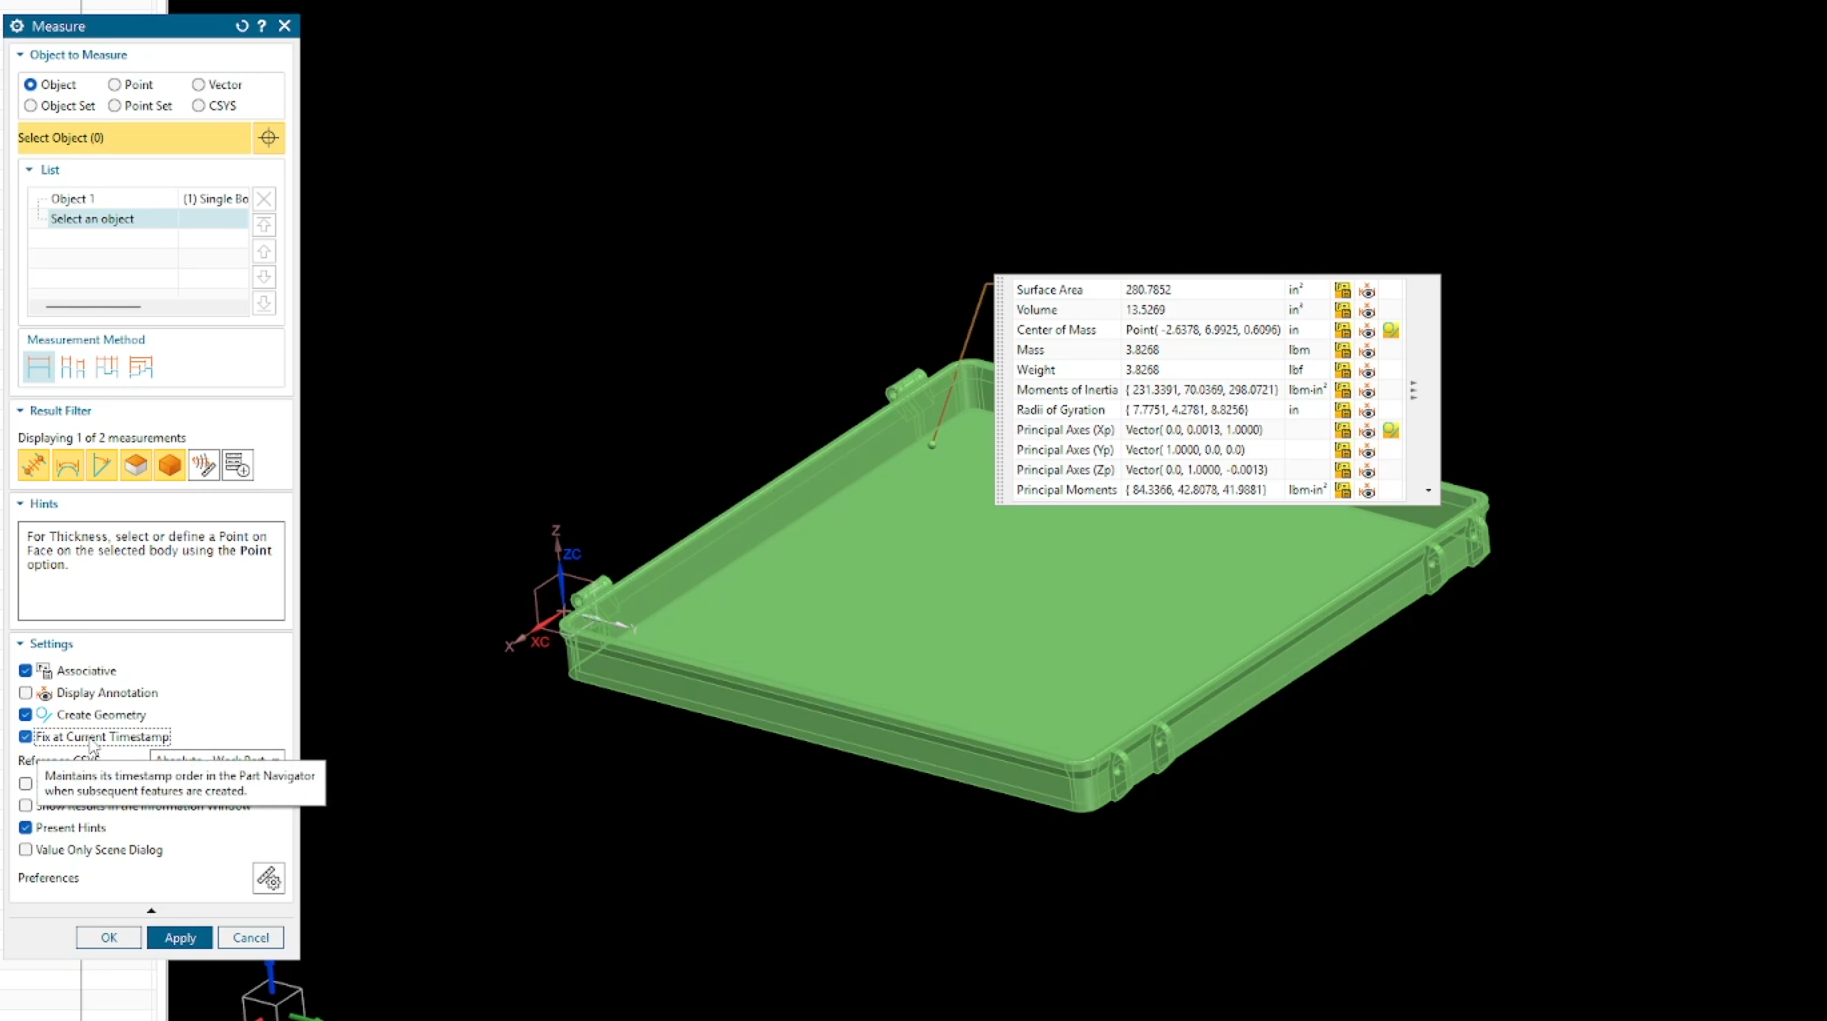
Here, you will find:
Mass: The total weight.
Volume: The total space occupied.
Center of Mass: The X,Y,Z coordinates relative to your WCS.
Step 3: Visualizing the Center of Gravity (CG)
Knowing the coordinates is one thing; seeing them is another. To keep a visual marker of the CG in your workspace:
Inside the Measure dialog, look for the Associative checkmark.
Ensure the Create Geometry is turned on.
Make sure Fix at Current Timestamp is turned on.
Click OK. NX will now place a point at the exact balance center of your part that updates automatically if you change the geometry.

Key Takeaways for Accurate Data
Update on Save: Ensure your "Update Mass Properties on Save" is toggled on in Customer Defaults.
Reference System: Always check if your CG is being measured from the Absolute Origin or your Work Coordinate System (WCS).
Assembly Mass: For assemblies, ensure all components have materials assigned. Be sure to change your radio button to Object Set as well.